DNS server not responding—How to fix It (step-by-step guide)


When you search for a website in your browser, your computer relies on the Domain Name System (DNS) to find the right IP address and load the webpage.
Sometimes, things don’t go as planned, and you end up with that frustrating "DNS server not responding" error. This means your browser can’t connect to a DNS server, so it doesn’t know what website to take you to.
The good news is that it’s a common issue and quite easy to fix. In this guide, we walk you through how to get your internet working again.
Tired of slow or unreliable internet? ExpressVPN’s private DNS boosts your speed, privacy, and security—no more ISP tracking or DNS leaks. Stay protected and browse freely with fast, censorship-free DNS on every ExpressVPN server.
Jump to…
What does "DNS server not responding" mean?
What causes the "DNS server not responding" error?
How to fix "DNS Server Not Responding" – Step-by-step solutions
Change your DNS server (Google DNS, Cloudflare DNS, OpenDNS)
Advanced network troubleshooting
Firewall & security fixes
How ExpressVPN can help fix DNS issues
Preventing future DNS errors—best practices
FAQ; About DNS server not responding
What does "DNS server not responding" mean?
If you see the DNS error message, it means your device can’t connect to the Domain Name System (DNS). DNS translates website names into IP addresses so computers can find and load websites. If the DNS server isn't responding, your browser can't find the website you’re looking for.
This might make it seem like your internet is down—even when the connection is fine. A DNS server error can happen for a few reasons, such as network issues, misconfigured settings, or server connectivity issues. Before we dive into the causes, let’s look at what DNS is and how it works.
What is a DNS server and how does it work?
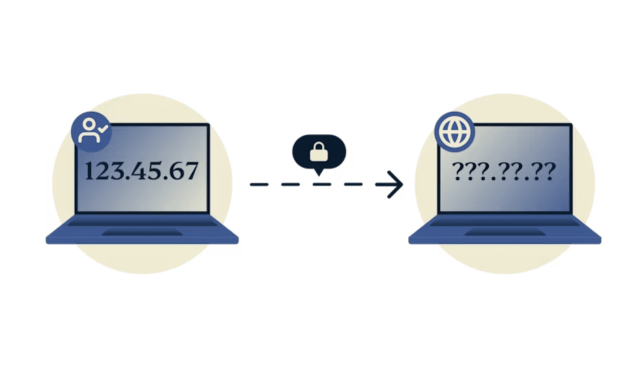
A DNS server is like the internet’s phonebook. It converts easy-to-remember website names into numerical IP addresses. Since computers communicate using IP addresses, DNS systems help you browse the web without having to remember numbers.
When you search a website name in your browser, the DNS server finds the matching IP address and sends your browser to the right page. If the DNS server isn’t working, your device won’t know where to go.
Common symptoms of DNS issues
Not sure if your issues are related to DNS? Here are a few tell-tale signs that signal DNS problems.
- Websites fail to load. Your browser may display errors like "DNS server not responding," "Server not found," or "This site can’t be reached."
- Unreliable connectivity. Some websites may load while others don’t, indicating that only some DNS requests are failing. This might result from an unstable DNS server or partial connection issues.
- Slow browsing experience. Websites may take unusually long to load as your device struggles to resolve domain names before connecting.
- "Website does not exist" errors. Even popular websites that should be accessible may fail to load. This could suggest a DNS issue rather than a problem with the website itself.
How DNS resolves domain names to IP addresses
When you type a website name into your browser, your device looks for the right IP address to load the site. First, it checks memory to see if it already knows the answer. If not, it asks a DNS resolver (usually from your ISP).
The request moves up the chain if the resolver doesn’t have it, starting with a root DNS server. Then it goes to a Top-Level Domain (TLD) server and finally to the authoritative name server, which holds the correct IP address. Once the correct IP address is found, the resolver sends it back to your browser, and the website loads—usually in a blink!
How DNS queries work step-by-step
- Device checks cache. Your computer first looks in its memory for the website’s IP address. If it finds it, the site loads instantly.
- Asks a DNS resolver. If the IP address isn’t cached, your device asks a DNS resolver (usually from your ISP) to find it.
- Resolver checks servers. If the resolver doesn’t have the answer, it asks other DNS servers, including a root server and a top-level domain (TLD) server (like .com or .org).
- Resolver finds the authoritative server. The resolver reaches the server that holds the website’s actual IP address.
- Resolver returns the IP address. The resolver sends the IP address back to your device, and the website loads.
If any step fails—due to a network problem, incorrect settings, or an unavailable DNS server—your browser won’t find the site, and you may see a "DNS server notr responding" error.
What causes the "DNS server not responding" error?
1. ISP issues or DNS server downtime
The issue isn’t always on your end—your ISP might have technical problems. For example, its DNS servers could be down. If your ISP's servers aren’t responding, your device can’t look up website addresses, even if your internet’s working fine. In this case, you may be able to fix the issue by switching to a public or private DNS service.
2. Misconfigured network settings
If your network isn’t set up correctly, your device can have trouble connecting to a DNS server. This might happen if your computer or router is using a manual IP address or DNS configuration that doesn’t fit your network.
If the wrong DNS server is set, your browser won’t know where to go when you search a website, leaving you stuck with loading errors. You can reset your TCP/IP settings or switch to automatic DNS to get back online.
3. Firewall or antivirus blocking DNS requests
Sometimes threat protection goes too far, and your firewall or antivirus software can flag DNS requests as a security risk. When this happens, your device can’t connect to the DNS server, which leads to the "DNS Server Not Responding" error.
A quick way to check is to temporarily turn off your firewall or antivirus and see if the problem goes away. If it does, you don’t have to leave your computer unprotected—just tweak the settings to allow DNS traffic while keeping everything else secure.
4. Router or modem malfunctions
Your router and modem are like the traffic controllers of your internet connection. They ensure data—including DNS requests—goes where it needs to. But if your router is overloaded or running outdated software, it might struggle with DNS requests.
A simple restart often fixes minor glitches and gets things running again. Just unplug your router and modem, wait 30 seconds to a minute, and then plug them back in. If the problem persists, consider updating your router’s firmware or resetting it to factory settings to start fresh.
5. DNS cache corruption
Your computer keeps a DNS cache to help websites load faster by remembering their locations. Sometimes, this stored information gets outdated or corrupted, preventing websites from loading properly.
A quick fix is to flush the DNS cache—this clears out the old records and forces your device to fetch fresh, accurate DNS information. This simple reset can often solve DNS issues and get you back online in no time.
6. IPv6 conflicts with DNS resolution
Many networks still use IPv4, but some devices and websites also support IPv6. If your system tries to use IPv6, but your network isn’t fully compatible, it can cause DNS resolution failures.
Disabling IPv6 in your network settings can sometimes fix the "DNS server not responding" error—especially if your ISP doesn’t fully support IPv6 yet.
How to fix "DNS server not responding"—step-by-step solutions
Here are a few simple troubleshooting steps to help restore your connection.
Restart your router and modem
One of the simplest fixes is to restart your router and modem, as they can sometimes glitch and disrupt DNS resolution. Just unplug them from the power source and wait about one minute. Plug them back in. Once they reconnect, try loading a website to see if the issue is resolved. Always try this as your first step!
Try using a different web browser
Sometimes, the problem isn’t your internet connection but your web browser. Try to open the website in a different browser. If the site loads in another browser, clearing your original browser cache and cookies or reinstalling it may fix the issue.
Test internet connection on another device
To see if the problem is specific to your computer, try to access the same website from a different device (on the same network). If other devices work fine, the issue is likely with your computer’s settings. If none of your devices can connect, the problem may be your router, ISP, or DNS provider—it’s unlikely that all your devices are faulty.
Network & DNS configuration fixes
If you still see the "DNS server not responding" error, your computer's DNS cache or network settings might be the problem. Your device keeps a memory of DNS records to help websites load faster, but sometimes this stored information gets outdated or corrupted. When that happens, your browser may struggle to find the right address, causing connection errors.
A simple fix is to flush the DNS cache. This clears out old records and forces your computer to grab fresh DNS information. Resetting your IP settings can also help if there’s a network misconfiguration blocking your connection. Here’s how to do it, depending on your device.
Flush DNS cache and reset IP settings
Clearing your DNS cache is quick and easy, but the steps are different depending on whether you’re using Windows, macOS, or Linux.
How to flush DNS on Windows
- Hit Windows + R to open the Run dialog box.
- Type cmd in the box and click OK to open the Command Prompt.
- In the Command Prompt window, type the following command and hit Enter:
Command: ipconfig /flushdns - You’ll see a confirmation message saying the DNS cache has been cleared.
- Close the Command Prompt window and load the website again.
Read more: How to change DNS settings in Windows
How to flush DNS on macOS
- Open Terminal by pressing Command + Space, typing Terminal, and hitting Enter.
- Type the following command (it works for most macOS versions) and hit Enter:
Command: sudo dscacheutil -flushcache; sudo killall-HUP mDNSResponder
- If asked, enter your admin password (it won’t show while typing, but it's working).
- Once done, restart your browser and check if the website loads.
How to flush DNS on Linux
- Open Terminal.
- Run one of these commands (it depends on your Linux version):
Command: sudo systemd-resolve --flush-caches
or
Command: sudo /etc/init.d/nscd restart - Hit Enter and wait a moment.
- Restart your browser and try to visit the website again.
Change your DNS server (Google DNS, Cloudflare DNS, OpenDNS)
If your default DNS server isn’t working, you can switch to a different one to restore your internet connection. Normally, your device automatically uses a DNS server from your ISP, but if that server is down, your browser won’t be able to find websites.
Changing your DNS server is simple enough, and using a public DNS like Google DNS or Cloudflare DNS can often fix the issue. Here’s how to update your settings on Windows and Mac.
How to change DNS on Windows
- Hit Windows + R on your keyboard to open the Run dialog box.
- Type ncpa.cpl and hit Enter to open your network connections.
- Find your active Wi-Fi or Ethernet connection, right-click on it, and choose Properties.
- Scroll down, select Internet Protocol Version 4 (TCP/IPv4), and click Properties.
- In the new window, select Use the following DNS server addresses and enter your preferred DNS:
-
- Google DNS: 8.8.8.8 and 8.8.4.4
- Cloudflare DNS: 1.1.1.1 and 1.0.0.1
- Check Validate settings upon exit, then click OK to save your changes.
How to change DNS on Mac
- Click the Apple menu and open System Settings.
- Select Network, then choose your active Wi-Fi or Ethernet connection.
- Click Details, then go to the DNS tab.
- Click the "+" button and enter your new DNS server addresses:
-
- Google DNS: 8.8.8.8, 8.8.4.4
- Cloudflare DNS: 1.1.1.1, 1.0.0.1
- Click OK, then Apply to save your new settings.
How to change DNS on a router
Changing your DNS settings at the router level applies the changes to all devices connected to your network.
- Open a web browser and enter your router’s IP address.
- Log in using your router’s admin username and password.
- Look for the DNS settings section (usually under LAN or internet settings).
- Replace the existing DNS addresses with:
-
- Google DNS: 8.8.8.8, 8.8.4.4
- Cloudflare DNS: 1.1.1.1, 1.0.0.1
- OpenDNS: 208.67.222.222, 208.67.220.220
- Save your settings and restart your router.
Advanced network troubleshooting
If basic fixes don’t resolve the "DNS server not responding" error, it’s time to dig deeper. Using command line tools, you can test your DNS resolution, check network route requests, and diagnose issues. This helps you identify whether the problem is your device, your DNS provider, or somewhere along the connection path.
Use command line tools to diagnose DNS issues
If you have trouble loading websites, command line tools help identify the source of the problem. They let you check whether a DNS server is responding and find possible delays or failures.
Testing DNS resolution with nslookup
The nslookup command checks if a DNS server can resolve a website’s name into an IP address. If this test fails, it likely means your DNS settings or server is the issue.
To run the test:
- On Windows, open Command Prompt by pressing Windows + R, typing cmd, and pressing Enter.
- On Mac or Linux, open Terminal.
- Type: nslookup example.com (replace example.com with any website).
If the command returns an IP address, your DNS is working. If not, your DNS settings may need to be changed.
Checking network routes with traceroute
The traceroute (or tracert on Windows) command shows the path your request takes to reach a website. If there are long delays or failures along the way, it could mean a problem with your ISP or a specific network point.
To run the test:
- On Windows, open the Command Prompt and type: tracert example.com
- On Mac or Linux, open Terminal and type: traceroute example.com
This will show each server (or "hop") your request passes through. If you see timeouts or errors, there may be a connection issue between your device and the DNS server.
Dig Command for advanced DNS testing
Linux and Mac users can use the dig command to check DNS. It gives in-depth information about how a website's domain is resolved.
- To run the test, open Terminal and type: dig example.com
- This will return detailed DNS records, including response times and the DNS server handling the request.
- If the output is empty or shows an error, your DNS server may not be working properly.
Disable IPv6 to avoid compatibility issues
Most of the internet still runs on IPv4, but newer networks and websites also support IPv6. While IPv6 is meant to improve speed and efficiency, it doesn’t always work smoothly with every internet provider or network setup. Sometimes, it can cause DNS errors like "DNS server not responding." If you're having trouble connecting, turning off IPv6 might help.
How to disable IPv6 on Windows
- Open the Control Panel and go to Network and Internet.
- Click Network and Sharing Center, then choose Change adapter settings on the left.
- Find your active connection (Wi-Fi or Ethernet), right-click it, and select Properties.
- Scroll down until you see Internet Protocol Version 6 (TCP/IPv6).
- Uncheck the box next to it and click OK to save the changes.
- Restart your computer and try loading a website again.
How to disable IPv6 on Mac
- Click the Apple menu and go to System Settings.
- Select Network, then choose your active connection (Wi-Fi or Ethernet).
- Click Details, then go to the TCP/IP tab.
- Look for Configure IPv6 and change it to Off or Link-local only.
- Click OK, then Apply to save your settings.
- Restart your Mac and see if your connection improves.
Read more: Disable IPv6 for better VPN protection
Restart your computer in Safe Mode
Sometimes, background apps, drivers, or security software can interfere with your internet connection and cause DNS errors. Safe Mode starts your computer with only the essential system files, making it easier to figure out if something running in the background is causing the problem.
Accessing Safe Mode on Windows
- Click the Start menu and open Settings.
- Go to Update & Security, then select Recovery from the left menu.
- Under Advanced startup, click Restart now.
- When your PC restarts, choose Troubleshoot → Advanced options → Startup Settings → Restart.
- On the next screen, press 4 or F4 to start in Safe Mode. If you need internet access, press 5 or F5 for Safe Mode with Networking.
- Once your computer starts, try loading a website to see if the DNS issue is still there.
Accessing Safe Mode on macOS
- Restart your Mac and press and hold the Shift key immediately.
- Release the key when you see the Apple logo or the login screen.
- Your Mac will start in Safe Mode, which only loads essential system files.
- Try connecting to the internet to see if the issue persists.
Check for DNS hijacking or ISP blocking
Your ISP might interfere with your DNS requests to block websites, redirect you, or slow down your connection. This is called DNS hijacking, and some ISPs also block third-party DNS services, forcing you to use their own servers.
To check if this is happening, take a DNS leak test. If your DNS requests aren’t going through the servers you set, your ISP may be redirecting them. Using a VPN with private DNS can help you bypass these restrictions and restore normal browsing.
Using a mobile hotspot to bypass ISP DNS issues
If you think your ISP’s DNS is the problem, a quick test is to connect to a different network using your phone’s mobile hotspot.
Turn on your hotspot and connect your computer to it. Then, try visiting the websites that weren’t working. If they load fine on mobile data but not on your home Wi-Fi, your ISP’s DNS servers are likely the issue.
To fix it, try switching to Google DNS or Cloudflare DNS in your network settings. If that doesn’t work, a VPN may help you bypass ISP restrictions.
Read more: Unblock websites with a VPN to free your internet
Firewall & security fixes
Firewalls and antivirus software are designed to protect your devices. Unfortunately, sometimes threat protection can be too strict and might block DNS requests by mistake. This stops websites from loading, even when your internet connection is fine.
It can be helpful to temporarily disable your firewall or antivirus to determine if they’re causing the problem. If turning them off fixes the issue, you may need to adjust settings to allow DNS traffic.
Temporarily disable firewall and antivirus
You should only disable security software as a test. Otherwise, you leave yourself open to cyber threats, so turning it off isn’t a good long-term strategy.
Here’s how to disable your firewall on Windows and Mac.
How to disable firewall on Windows
- Open the Start menu and search for Windows Security.
- Go to Firewall & network protection.
- Click on your active network (either Public, Private, or Domain).
- Toggle Microsoft Defender Firewall to Off.
- Try loading a website to see if the DNS issue is resolved.
If this fixes the problem, go back into Firewall & network protection, turn the firewall back on, and click Allow an app through firewall to add exceptions for your browser or DNS service.
How to disable firewall on Mac
- Click the Apple menu and go to System Settings.
- Select Network, then click Firewall.
- Toggle the Firewall switch to Off.
- Try loading a website to check if the issue is resolved.
If turning off the firewall solves your issue, you can turn it back on and go to Firewall Options to allow connections for specific apps or services.
How ExpressVPN can help fix DNS issues
ExpressVPN solves DNS problems by offering a private, secure, and reliable DNS service that works automatically whenever you connect to one of our encrypted servers.
How a VPN bypasses ISP DNS errors
Some internet providers use their own DNS servers—they can be slow, unreliable, or restricted. They may also block certain websites, redirect searches, or log your activity. A VPN bypasses this by sending your DNS requests through its private servers instead of your ISP’s. This keeps your browsing private and helps websites load faster, even if your ISP’s DNS is having issues.
ExpressVPN’s private DNS vs. public DNS
Many people use public DNS servers like those from Google or Cloudflare. They’re often faster than ISP DNS servers but can still be logged, blocked, or hijacked.
ExpressVPN uses private DNS on every server—this means your requests are never shared with third parties. This improves security, prevents DNS leaks, and reduces errors that happen when public DNS servers fail.
How to use ExpressVPN to improve DNS reliability
No setup is needed to use ExpressVPN’s private DNS. Once you connect to a VPN server, your DNS requests go through ExpressVPN instead of your ISP or a public DNS provider.
Simply click connect to enjoy using private DNS servers:

This reduces DNS failures, speeds up website loading, and helps avoid tracking. If DNS issues keep happening with your regular connection, switching to a VPN can provide a more stable and private internet experience.
ExpressVPN’s private DNS keeps your connection fast, secure, and private, blocking ISP tracking and DNS leaks. Enjoy browsing securely and freely on every ExpressVPN server.
Preventing future DNS errors—best practices
You can prevent DNS errors from happening in the future by keeping an eye on some of your settings. Let’s take a look at how to stop DNS errors.
Use a reliable public DNS provider
Your ISP assigns a default DNS server, but these aren't always the most stable or fast. Switching to a public DNS provider can help. But while public DNS servers like Google DNS and Cloudflare DNS can be faster and more reliable than your ISP’s default, they’re not foolproof. They can still face outages, slowdowns, or even ISP interference.
Use a VPN with private DNS to avoid ISP issues
A private DNS server, like ExpressVPN’s, offers a more secure and stable alternative. It encrypts your DNS requests, keeps your browsing private, and reduces the risk of DNS hijacking. It also ensures fast and uninterrupted connection—even when public DNS servers run into issues.
Using a VPN with private DNS, like ExpressVPN, helps bypass these restrictions. Unlike public DNS providers, private DNS encrypts your requests, keeping your browsing more secure while preventing DNS hijacking.
Regularly restart your router and modem
A quick restart every few weeks can help keep things running smoothly. Just unplug the power cable, wait about a minute, then press the power button to turn them back on. If you're using an ethernet cable, make sure it's plugged in securely to avoid any connection problems.
Keep your network drivers updated
Your network adapter driver helps your computer connect to the internet. If it's outdated or corrupted, you might run into DNS failures or slow connections. To check for updates, go to the network connections page in your operating system and install the latest version of the driver. Keeping it updated ensures better compatibility and fewer connection issues.
Monitor DNS performance using online tools
If your internet feels slow or unreliable, use free tools to check if DNS is the issue. Open Wireless Diagnostics on a Mac or use Network Diagnostics on Windows to analyze DNS connections. You can also compare your preferred DNS server to an alternate DNS server using online tools like DNS Benchmark or Namebench to see which performs better.
Regularly test alternative DNS providers
DNS performance isn’t the same everywhere—what works great in one place might be slow or unreliable in another. If you keep running into DNS errors or sluggish connections, it’s worth testing different DNS servers to see which one works best for you.
Try tweaking Google Chrome’s secure DNS settings, adjusting DNS options in Microsoft Edge, or turning on DNS over HTTPS in Mozilla Firefox. Finding the right server can seriously boost your browsing speed and make your connection more reliable.
FAQ: About DNS server not responding
<h3 id="faq"><strong style="font-weight: 900;">How do I find my DNS server on Windows?</strong></h3>
<p>
- Press Windows + R, type cmd, and hit Enter to open Command Prompt.
- Type ipconfig /all and press Enter.
- Look for the DNS Servers entry under your active network adapter.
How do I find my DNS server on Mac?
How do I know if I have DNS problems?
Another way to check is by running the nslookup command in Command Prompt or Terminal: nslookup example.com. If the response is slow or shows an error, there may be a problem with your DNS server.
Is it safe to reset DNS?
What is the best DNS server for speed and security?
Can a VPN fix "DNS server not responding" errors?
Why does my DNS keep failing?
How often do ISPs change my DNS settings?
What’s the difference between public and private DNS?
How to check if my DNS is secure?
You can also run the nslookup or dig command in the Command Prompt or Terminal to see which DNS server is responding to your queries. If it doesn’t match the one you set, your ISP may be redirecting your DNS traffic.
Take the first step to protect yourself online. Try ExpressVPN risk-free.
Get ExpressVPN