How to create a VPN: A complete beginner-to-expert guide

A virtual private network (VPN) is an essential privacy tool. And while you could subscribe to a commercial VPN service with easy-to-use apps, it’s also possible to set up a VPN yourself.
This article will help you weigh the pros and cons of creating your own VPN and walk you through the process of setting one up. You’ll also learn about VPN protocols, best security practices, how to troubleshoot common issues, and lots more.
Should you create your own VPN or use a commercial one?
Most people don’t need to create their own VPN. Subscribing to a high-quality and reliable commercial VPN service, like ExpressVPN, is simply a lot easier and likely more secure. After all, we’re talking about a piece of software that’s been thoroughly tested by in-house and external experts, which a DIY VPN never is.
To help you make your decision, we’ve broken down the pros and cons of creating your own VPN versus using a commercial VPN.
Pros and cons of creating your own VPN
| Pros | Cons |
|
|
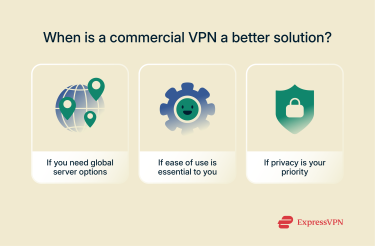
When a commercial VPN might be better
As mentioned, for most people, a commercial VPN is the better option of the two. This is particularly true in case:
- You need global server options: Commercial VPNs have servers in dozens of countries worldwide.
- You want something easy to use: A good commercial VPN handles all the bothersome stuff for you. You can finish downloading a VPN and connect to a server in less than 5 minutes, and you never have to worry about maintenance.
- Privacy is your priority: Commercial VPNs use shared IPs and rotate their IP addresses constantly, so it’s very difficult to track you. The best VPN providers also have strict no-logs policies to protect your privacy.
How to create your own VPN: A step-by-step guide
There are two main ways to create your own VPN. You can set up a VPN server at home using your own hardware, or you can opt to host your VPN on a cloud-based virtual private server (VPS).
A home setup is cost-effective and gives you secure, remote access to your home network, but it requires more technical skill and hands-on maintenance. You also have to keep your device on at all times.
Hosting on a VPS avoids complex home network setup and offers better uptime and more bandwidth, but it costs about as much as a commercial VPN service, and it means that you’re once again entrusting your internet traffic to a third party.
Method 1: Set up a VPN server at home
If you enjoy hands-on projects, you can build your own VPN server using Lightway, ExpressVPN’s fast and lightweight protocol. The setup requires two parts:
- A server (commonly a Linux VPS, but you can also use your own machine).
- A client (the device you’ll connect from, like your laptop or PC).
Lightway currently supports Linux and macOS, with Windows client support on the way. Advanced users on Windows can experiment with WSL or Docker, but for now Linux offers the smoothest setup, so the guide below focuses on that.
Prerequisites
First, make sure both your server and client have the right tools installed. You’ll need Earthly for build orchestration, Docker (required for some build environments), and the htpasswd tool (found in the apache2-utils package on Debian/Ubuntu). You will also need OpenSSL for generating encryption keys.
The quickest way to get OpenSSL is through your package manager (for example, sudo apt-get install openssl). Lightway includes post-quantum protection using the Module-Lattice-Based Key-Encapsulation Mechanism (ML-KEM, formerly known as Kyber), the National Institute of Standards and Technology (NIST)-standardized post-quantum key-exchange algorithm. This support is built into the default Lightway build, so you don’t need to make any additional changes to enable post-quantum cryptography (PQC).
Step 1: Get Lightway’s source code
On both the server and the client:
cd lightway
earthly +build
The build may take a while. While it runs, you can set up the encryption.
Step 2: Create certificates (server side)
Lightway needs a certificate authority (CA) and server certificate to establish trust.
- Create a CA:
mkdir certs && cd certs
openssl genrsa -out ca.key 4096
openssl req -x509 -new -nodes -key ca.key -sha256 -days 3650 -out ca.crt
You’ll be asked for details (country, state, etc.). Fill them in.
- Generate a server key and certificate:
openssl genrsa -out server.key 4096
openssl req -new -key server.key -out server.csr
openssl x509 -req -in server.csr -CA ca.crt -CAkey ca.key -CAcreateserial -out server.crt -days 365 -sha256
Step 3: Create user credentials (server side)
Lightway uses an .htpasswd-style file for users:
htpasswd -B -c lwpasswd my_user
chmod 600 lwpasswd
This creates a user named my_user with a password you define.
Step 4: Configure the server
- Example config: server_config.yaml
- Edit it to point to your server.key, server.crt, and the lwpasswd user database.
Step 5: Start the server
After the build, executables live in ./target/*/release.
Run the server:
Step 6: Set up the client
- Copy the CA certificate (ca.crt) from your server to your client device.
- Create a client config based on the example here.
chmod 600 ./your-client-config.yaml
- Add your server’s public IP address to the client_config.yaml file. If you’re using a VPS, the IP address will be shown in your provider’s dashboard. If you’re running your server at home or on local hardware, you can obtain your public IP by running curl ifconfig.me or by checking your router’s WAN IP display.
chmod 600 ./your-client-config.yaml
- Run the client:
target/*/release/lightway-client --config-file './your-client-config.yaml'
If everything’s configured correctly, your client traffic should now route through your Lightway VPN server. If you run into issues:
- Double-check file paths in your config files.
- Make sure ports are open on your VPS firewall.
- If you’re testing on the same machine, it may fail without proper network setup. Try using a true client/server split.
Note that Windows support is in development; keep an eye on the Lightway GitHub repo for updates.
Method 2: Use a cloud provider to host your VPN
Setting up a VPN using a cloud provider works much like hosting one on your own hardware. Most VPS services support popular protocols like OpenVPN and WireGuard. You can also host a VPN using Lightway.
The process may differ depending on your VPS, though, so we recommend following the steps outlined by your specific provider.
Recommended VPS services
There are a lot of different VPS services out there. The best one for hosting a VPN depends heavily on your specific needs. Here’s a quick overview of some of the more popular services.
- Digital Ocean: It’s a highly reputable VPS provider with data centers all around the world. It also comes with OpenVPN pre-installed and is lauded for having excellent documentation. However, it’s a slightly pricier option.
- Hetzner: It’s a popular choice in the tech community for its affordability and reliability. But it has fewer global server locations. Its data centers are primarily located in Germany and Finland.
- Oracle: It has a generous free tier that makes it a viable choice for budget-conscious users, so long as you’re willing to deal with its resource constraints. Note that some users report that the service sometimes deletes free servers without warning.
Optional: Set up VPN on your router for home network protection
If your main goal is to be able to enjoy VPN connectivity throughout your home, rather than create your own VPN, the easier solution would be to get commercial VPN service on your Wi-Fi router. There are a few ways to do this.
Option 1: Use a pre-configured VPN router
A VPN router is a router with a VPN pre-installed and pre-configured on it. ExpressVPN’s Aircove is one such router.
All traffic that passes through a VPN router is encrypted, so this is a great way to secure the internet traffic for every device in your house without having to install a VPN app on each one individually.
As a bonus, a VPN router will also protect devices that don’t support VPN apps, like gaming consoles, streaming sticks, and smart speakers.
Option 2: Manually configure a VPN on your existing router
Some commercial VPN services offer configuration files that allow you to manually set up the VPN on your existing router. However, this method requires some technical know-how, and you need to make sure that you have a compatible router. Read more about the topic in our guide to installing a VPN on a router.
Option 3: Flash your existing router with VPN firmware
If you don’t want to buy a VPN router, but your current router doesn’t support manual VPN configurations, you might be able to unlock this functionality by “flashing” it with third-party firmware like DD-WRT, OpenWRT, or FreshTomato. This replaces the router’s original software with a custom version that supports VPN configurations.
But be warned that flashing your router will void its warranty and, if done incorrectly, can permanently damage (or “brick”) your router.
VPN protocols explained: Which one should you use?
A VPN protocol governs how data is transmitted between a device and the VPN server. The choice of VPN protocol can affect the speed, security, and reliability of your traffic.
Here’s a breakdown of some of the most common VPN protocols used today:
- OpenVPN: A secure, open-source protocol that offers good speeds and is widely trusted. It can disguise VPN traffic as regular internet traffic, so many commercial VPN services use it for obfuscation.
- WireGuard: A newer, open-source protocol known for its speed and efficiency thanks to lightweight code. However, it doesn’t support Transmission Control Protocol (TCP) mode, so it may not be a good choice for networks with strict firewalls.
- Lightway: A modern, open-source protocol created by ExpressVPN. It’s faster, uses less code than many older protocols, and has undergone independent security audits.
- Layer 2 Tunneling Protocol with Internet Protocol Security (L2TP/IPsec): An older and slower protocol that top VPNs today rarely use.
- Point-to-Point Tunneling Protocol (PPTP): One of the fastest protocols, but its encryption is weak and easily cracked. It’s outdated and no longer recommended for secure connections.
For more detailed information and direct comparisons, read our guide on VPN protocols.
Security best practices for your DIY VPN
Enable kill switch
A kill switch shuts down your internet traffic in the event that your VPN connection drops. This prevents accidental data leaks. Some VPN clients, like the official OpenVPN client, OpenVPN Connect, include a kill switch feature. If the client that you’re using doesn’t, you may have to create custom firewall rules to block internet traffic unless the VPN is active.
Use strong encryption and updated protocols
Choose a trusted modern VPN protocol, like OpenVPN or WireGuard, that uses strong encryption. Avoid using insecure, outdated VPN protocols, like PPTP.
Monitor your server for unauthorized access
To keep your DIY VPN server secure, it’s important to monitor it for suspicious activity. There are a few tools that can help with this. One of the most popular is Fail2Ban. It watches your server’s login activity and automatically blocks IP addresses that repeatedly fail to log in. This protects your VPN from brute-force attacks, where someone tries to guess your password by trying over and over again.
Another useful tool is Wazuh, which collects and studies your server logs (like records of who logged in, when, and what errors occurred). It looks for unusual patterns, such as repeated failures, strange file changes, or unexpected activities, and can alert you so you can investigate.
Real-world use cases for a self-hosted VPN
Self-hosted VPNs can be used in many of the same scenarios as commercial VPNs: to secure remote work, bypass content-based internet service provider (ISP) throttling, or maintain a stable connection while traveling. However, in most of these cases, a commercial VPN is typically easier to set up, offers more server locations, and may provide stronger privacy protections out of the box.
A key exception is accessing your private local network from anywhere. Commercial VPNs don’t provide access to devices on your home network, like printers, file servers, or Internet-of-Things (IoT) devices, whereas a self-hosted VPN allows you to connect directly to your home or office local area network (LAN).
Common DIY VPN issues and how to troubleshoot them
Setting up your own VPN can be rewarding, but it often comes with challenges. Here are some common DIY VPN issues and how to fix them.
Connection drops or slow speeds
Slow VPN performance can have many causes, including physical distance from the server, network congestion, or high load on the VPN server.
To troubleshoot, start by testing your internet speed without the VPN. Then, try connecting to a VPN server that’s closer to you. Switching to a different VPN protocol can also improve speed. Finally, check whether other applications on your VPN host device are using bandwidth or processing power.
Port forwarding and firewall conflicts
For your VPN server to accept incoming connections, you need to forward the necessary ports from any network device acting as a gateway (such as a router or firewall) to your VPN server’s local IP address. If these ports aren’t properly forwarded or if firewall rules block VPN traffic, clients won’t be able to connect.
Check your VPN server’s firewall to ensure that it allows the necessary ports. If you’re using a cloud provider to host your VPN, check your VPS provider’s firewall or security settings. Universal Plug and Play (UPnP), which automates port forwarding, can conflict with manually configured port forwarding rules, potentially causing connection issues or inconsistent behavior, so try disabling it.
DNS leaks and how to prevent them
A Domain Name System (DNS) leak refers to when your DNS queries leak outside of the encrypted VPN tunnel. This may allow third parties to track your online activities and see your IP address. DNS leaks can occur if your VPN is misconfigured.
You can prevent DNS leaks by ensuring that your VPN uses only secure DNS servers, by blocking non-VPN traffic using firewall rules, and by disabling IPv6 if your VPN doesn’t support it. Check for leaks using free tools, like our DNS leak checker.
Costs of creating and running your own VPN
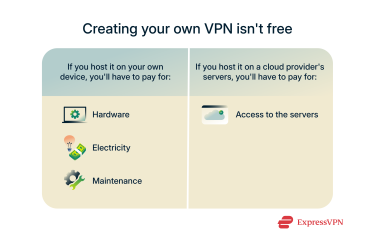
Creating your own VPN may be more cost-effective than using a commercial VPN, but it isn’t free.
Hardware and electricity costs (for home setups)
If you’re hosting the VPN server on your own hardware, you’ll have to pay for the device itself and cover the electricity bill for keeping it running 24/7.
Cloud hosting and software licenses
While some very limited free options do exist (like Google Cloud’s Compute Engine free tier), hosting your VPN on a cloud provider typically means paying a subscription fee for access to their servers. If your usage is light, you might be able to get a VPS plan for around $2 per month with a budget provider. However, if you need more resources or better performance, you may have to pay upwards of $4 per month. This means that creating your own VPN could end up costing as much as a commercial VPN subscription.
Hidden maintenance costs
When you run your own VPN, you may need to invest time and money into ongoing maintenance. For example, hardware can break and need replacing, and you might want to invest in advanced firewall software or monitoring services to help keep your VPN safe and running smoothly.
FAQ: Common questions about creating your own VPN
Can I create a VPN for free?
Sort of. It’s possible to create a VPN without paying for software, since open-source VPN protocols like Lightway are free to use. However, you’ll still have to pay for hardware and electricity or cloud hosting fees, depending on where you host your VPN.
Is it legal to run your own VPN?
VPNs are legal in most countries. This includes running your own VPN. But there are some countries where VPNs are illegal, so it’s a good idea to familiarize yourself with local laws and regulations before running your own VPN.
How secure is a self-hosted VPN?
A self-hosted VPN can be very secure if you configure and manage it correctly. In some cases, it can be more secure than a commercial VPN service because you aren’t relying on a third party to handle your data. That said, hosting the VPN on your own device can make your IP address easier to trace, and using a cloud provider means you’re still trusting another company with your traffic.
Can I use a homemade VPN on all my devices?
Yes. Most VPN protocols are compatible with all major platforms, including Windows, macOS, Linux, Android, and iOS. If your device isn’t compatible with VPN client apps (like a smart TV or certain game consoles), you could still protect its traffic by installing your homemade VPN on your router.
What's the difference between a VPN server and a VPN client?
A VPN server is the system that hosts the VPN. It creates a secure, encrypted connection and handles incoming and outgoing internet traffic for connected devices. This server could be a computer at home, a cloud-based virtual private server (VPS), or a special router.
A VPN client is the app or software on your personal device (like your phone, laptop, or tablet) that connects to the VPN server. It initiates the connection, authenticates with the server, and routes your internet traffic through the secure tunnel the server provides.
Take the first step to protect yourself online. Try ExpressVPN risk-free.
Get ExpressVPN











Comments
No
HW can I create a vpn
Thanks 🙏
ShadowSocks is not like a http proxy - this is incorrect. It is in fact a split proxy based on SOCKS5 proxies and uses AES 256 CFB encryption. HTTP proxies don't even use encryption (HTTPS proxies do).
ShadowSocks is not like a http proxy – this is incorrect. It is in fact a split proxy based on SOCKS5 proxies and uses AES 256 CFB encryption. HTTP proxies don’t even use encryption (HTTPS proxies do